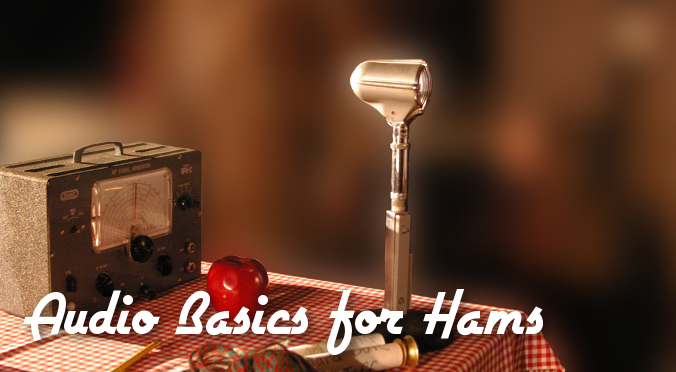
Audio Basics for Hams, Part 1!
This week we had a great discussion on our Sunday evening Technical Forum (every Sunday at 7:30pm EST on the 145.150 W4GSO repeater, BTW!) about audio gear that we use to improve the quality of the sound we transmit or receive. That got me to thinking that it might be nice to put together a series of posts about audio, the types of gear we use to manipulate audio, and other basics specifically related to our hobby. So here (hear!) it is! My plan is to divide ideas up into multiple posts so that we can explore the concepts in a little more depth than could be done otherwise. I don’t plan on getting too deep – it’s not really necessary to do that – but hopefully this will be a helpful way to get the less-experienced among us to a good place.
Yes, I know that this information won’t be too useful for the guys who mainly do CW or digital modes, but idiosyncrasies related to those can be covered in future posts. And as a disclaimer and plea for civility: I have done recording professionally for years and have engineered FOH sound on a large scale for well over a decade. I consider myself an expert, but I’m sure there are those who would disagree with certain ways I might explain things. I know that there are varying opinions (and strong ones, at that) on topics like this, but I intend this to be a primer of sorts and don’t want to debate the minutiae. You can head on over to the forums and have the mother of all debates over there if you really need to get something out of your system ;).
With all of that out of the way, here’s the first bite-sized chunk: we all know what a transceiver is, but what about a transducer? A transducer is a device that changes one form of energy into another. Here are a couple of examples: the heating element in your stove changes electricity into heat, and a steam engine turns heat into motion. What does that have to do with sound? Well, we need some way to convert the sound energy that is produced by your lungs, vocal cords and mouth into electrical energy that can be used by your radio. That’s where a microphone, or a transducer, comes in. A speaker is a transducer too, but in the opposite direction – it changes electrical signals into sound waves. How a microphone converts audio energy into electrical energy is accomplished in a few different ways. I’m going to focus on the two primary methods, and I’m going to explain them in layman’s terms and not get into too much theory or numbers. Hopefully it’ll stick better that way.
The simplest way to create electricity from sound is the same way electricity is created in a generator: you pass a magnet over a coil of wire to induce a current in the wire. In our case, the magnet is attached to a thin plastic membrane called a diaphragm that’s in the top of a microphone. The magnet is mounted so that it’s surrounded by a coil of wire, so when when a sound source hits the diaphragm, the magnet moves within the coil, generating a very tiny voltage that is analogous to the sound waves hitting it. That means that louder sound waves hitting the diaphragm will cause it to move further than softer ones, and therefore create a larger voltage at that point. This type of microphone is called a dynamic microphone. Dynamic microphones usually have pretty thick plastic diaphragms (relatively speaking, of course) since the diaphragm needs to carry the weight of the magnet, meaning that they can usually handle loud sounds without getting damaged. It also means that they have relatively little definition in the sound compared to other types of microphones because it takes a lot of energy to move the diaphragm/magnet combo a little.
What if we want more definition in the sound? How can we accomplish that? The second major type of microphone is called a condenser microphone, and condenser mics give that added definition we desire. Condenser is the old-tymey way of saying capacitor, so there’s that right up front. You should probably already know that capacitance is the ability for an electronic component to hold an electrical charge. But did you know that some capacitors can change their voltage based on an external stimulus? Of course you did! We use that capability in our RF tuners to add or reduce capacitance in our antenna system all the time! While this isn’t exactly the same, it’s similar: in a condenser mic, the diaphragm acts as one plate of the capacitor, and a fixed back plate acts as the other. As electricity is fed into this capacitor, the output voltage is dependent upon the distance between the diaphragm and the back plate. As sound hits the diaphragm, that distance changes, thereby varying the voltage. Since there’s no magnet to mess with, the diaphragm can be much lighter and thinner than those found in dynamic mics, so it can move about more easily, increasing definition in the sound. The one drawback (which really isn’t too big of a deal with the advancement of technology) is that traditionally condenser mics haven’t been able to handle as loud of sounds as dynamic mics without damaging the wimpier diaphragm, but that’s not really even the case anymore since very thin diaphragm material has gotten so much stronger.
Electricity? What electricity? You need to feed electricity into a condenser microphone? Yep! It’s actually there for two reasons: one is to charge the capacitor as I’ve already mentioned. The second is a bit less cool. The amount of voltage change that is created by a condenser capsule (that’s the name used for the assembly that holds the diaphragm, back plate, and associated pieces) is much, much less than the voltage that is created by a dynamic mic. Somehow we’ve got to get it up to a level that can be sent down the microphone cable reliably, and to a level that the next component in the chain can use. So, we need a preamp to be built into our microphone. That’s the second reason: to power the preamp within the mic to get the mic signal up to a usable level.
How do we get electricity to our condenser mic anyway? Some mics have battery compartments built-in and the mic gets the juice it needs from that. The more common way is to use an external device, usually a mixer or external preamp of some sort, to supply the mic with phantom power. It’s not called that because it’s spooky or scary, but because the circuits that provide the electricity to the microphone send it down the same two wires that the mic uses to send the audio signal (the newly-varied voltage) back to the next audio device in the signal path. In other words, the same wires are used for two different purposes, and the audio signal has no idea that the electricity is there! Therefore: phantom. Condenser mics absolutely require phantom power to operate, but what about dynamic mics? Will phantom power break one if you forget to turn it off? Well, it depends. Any new-ish dynamic mic will have circuitry in it that can handle the current with ease and will be fine. If you’re using an older mic though, it’s probably a good rule of thumb to always remind yourself to disable the phantom power before connecting the microphone, otherwise you might inadvertently release the magic smoke that doesn’t so easily go back in.
OK, so now we have dynamic and condenser mics as our primary types. Which one to choose? Really that depends on your budget, interest in experimenting, and the purpose of your mic. Most standard handheld mics that come with new rigs have small electret condenser mics built into them because they’re very small and have very good audio for their size. However, if you’re operating on SSB, you probably don’t care too much about high-frequency audio definition because much of it will be lost in the limited bandwidth of the mode anyway, so a dynamic mic might be more appropriate as a replacement. As a general rule, with mics of equivalent build quality, dynamic mics will be less expensive than condenser mics because there is less circuitry inside and the tougher diaphragm capsules are easier to build. Keep in mind that the vast majority of microphones that are considered “broadcast quality” are dynamic: see the Electrovoice RE20, Shure SM7B, and Heil PR40 as prime examples. If you really must have the highest quality input sound for your radio, feel free to go out and buy a Neumann U87 or Telefunken U47. Let me know when you do because I’d like to come over and gawk for a while. In all honesty, you can find great sounding dynamic and condenser mics in a similar price range now. The primary difference will probably be whether you want to go buy the additional gear that will supply the phantom power to a condenser. If not, a dynamic mic is probably in your future.
I think that’s enough for now. Next time we’ll discuss microphone patterns (where a mic picks up best), proximity effect, and other concepts about actually using microphones.
If you’ve made it this far and you’re a glutton for punishment, head on over to Audio Basics for Hams, Part 2 – All About the Pattern.
1 Reply to "Audio Basics for Hams, Part 1!"
Got something to say?
You must be logged in to post a comment.







K4ANU
August 6, 2015 (12:33 pm)
A little tid bit to add – if you’re looking for the quality of the Neumann U87 but don’t have the 4k+ to drop on one, the Neumann TLM103 is about one quarter the cost of the U87 and it’s capsule is essentially the same as the U87. To boot, it’s REALLY quiet too… from a “mic noise” perspective and is used by a lot of VO industry professionals.